Do you know if your SPF, DKIM and DMARC records are setup correctly? Are you getting bounceback emails when sending messages to a new client? This article will show you how to setup the SPF, DKIM and DMARC records at your domain host to help resolve your issue.
“Remote server returned ‘554 5.7.5 Permanent error evaluating DMARC policy”
The reason you need to setup your SPF, DKIM and DMARC records is to help verify who you are. Adding certain DNS records using your domain register provides a method for email servers to verify you have authority to send messages using your domain name.
To add the following records, please log into your Domain Registers website. Your Domain Register is who you purchased your domain through. For us it’s GoDaddy, you have something different. Log into your domain registers site, select your domain and then select DNS.
This is where you can add new DNS records.
If you’re using a web host’s mail server, you’ll need to find what it’s IP address is. You can find this by sending a Ping result to your domain name. On Windows open CMD, and on Mac open Terminal and use the following command.
ping yourdomainname.com
Add the following new DNS Record.
SPF Record
Type of Record: TXT
Name: @
Data: v=spf1 11.22.33.44 -all
TTL: 1 hour
(Replace 11.22.33.44 with your web hosts IP address)
We’re using Office 365 for our email services. Our data record is the following.
Type of Record: TXT
Name: @
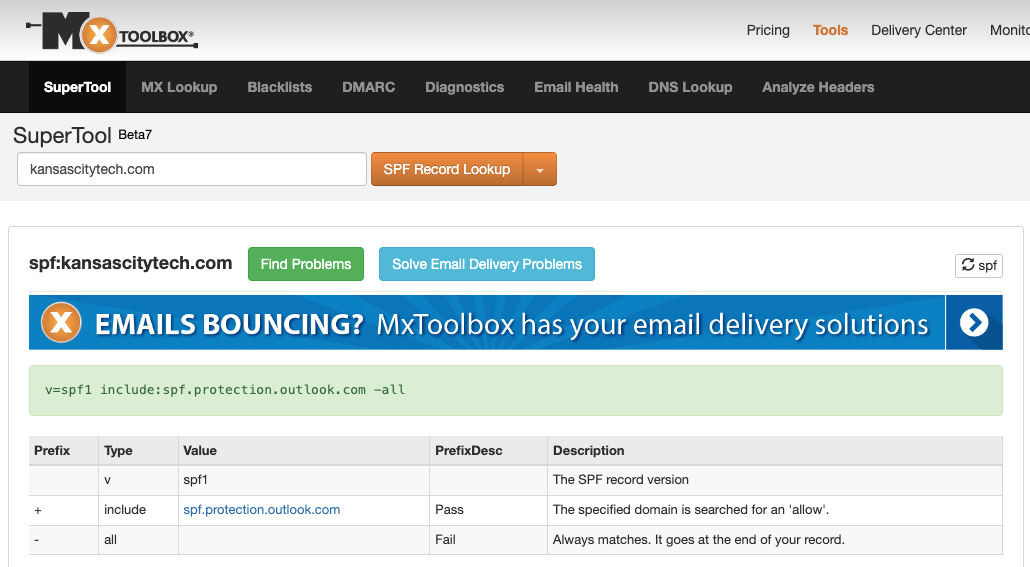
Data: v=spf1 include:spf.protection.outlook.com -all
TTL: 1 hour
To check if your new SPF record is in place, visit MXToolBox.com. Search for your domain name, then select SPF Record Lookup using the search button.
It may take several hours for new entry to appear.
SPF stands for SPF (Sender Policy Framework)
DKIM
Below we’ll go through the process to add a DKIM record for Google Workspace, Microsoft Office 365 and self-hosted email servers. To add a DKIM record, we first have to generate a public and private key. There are many free online resources. We’ll go over using a self-hosted email server, Office 365 and Google Workspace.
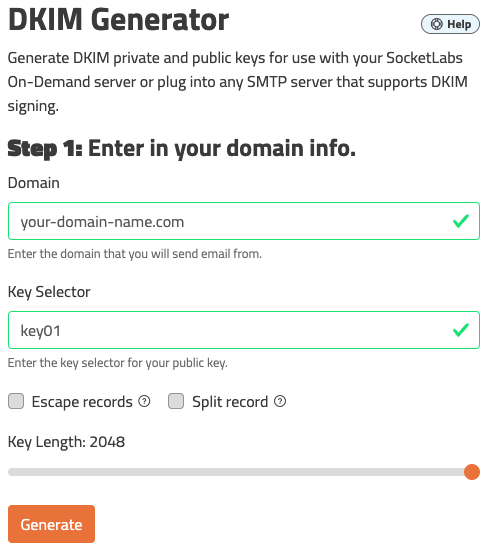
For self-hosted email services we’ll use the DKIM generator at SocketLabs.com.
Domain: your-domain-name.com
Key Selector: key01
No need to check the boxes for Escape records or Split records at this time.
Click Generate.
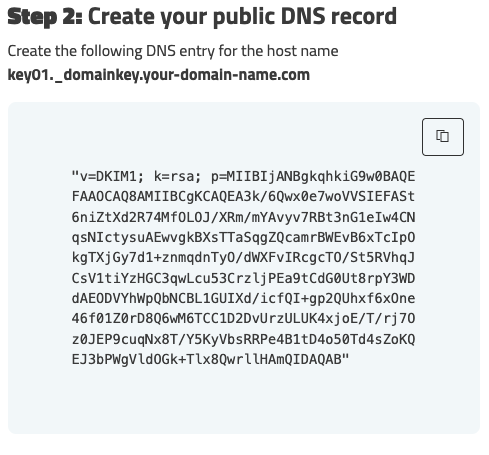
Back at your domain register, create a new TXT record with the Public DNS Record that was just created for you.
Below is an example.
Type of Record: TXT
Name: key01._domainkey.your-domain-name.com
Data: v=DKIM1; k=rsa; p=MIIBIjANBgkqhkiG9w0BAOEFAAOCAQ8AMIIBCgKCAQEA3k/6Qwx0e7woVVSIEFASt6niZtXd2R74MfOLOJ/XRm/mYAvyv7RBt3nG1eIw4CNqsNIctysuAEwvgkBXsTTaSqgZQcamrBWEvB6xTcIpOkgTXjGy7d1+znmqdnTyO/dWXFvIRcgcTO/St5RVhqJCsV1tiYzHGC3qwLcu53CrzljPEa9tCdG0Ut8rpY3WDdAEODVYhWpQbNCBL1GUIXd/icfQI+gp2QUhxf6xOne46f01Z0rD8Q6wM6TCC1D2DvUrzULUK4xjoF/T/rj7Oz0JEP9cuqNx8T/Y5KyVbsRRPe4B1tD4o50Td4sZoKQEJ3bBWgVldOGk+Tlx8QwrllHAmQIDAQAB
TTL: 1 hour
 For those using Office 365 please visit the following URL.
https://security.microsoft.com/dkimv2
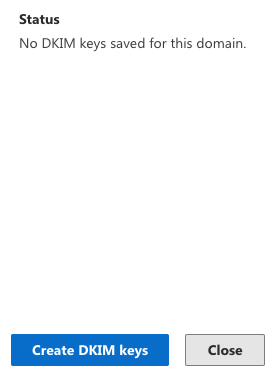
Select the domain that you are sending mail from and click on Create DKIM Keys.
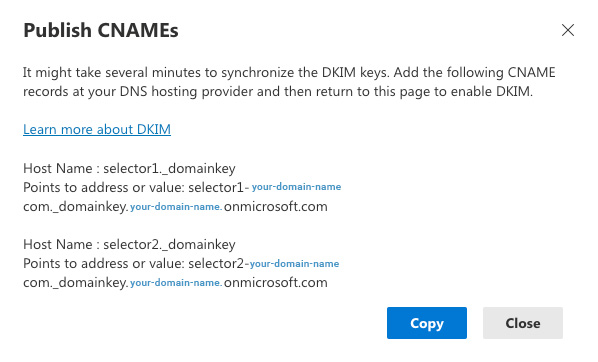
A new window will appear with the DNS records we need to add at your domain register.
Back at your domain register, in this example we’re using GoDaddy, select the option to Add New Record.
Type of Record: CNAME
Name/Host Name: selector1._domainkey
Data/Value: selector1-your-domain-name-com._domainkey.your-domain-name.onmicrosoft.com
TTL: 1 hour
We need to add both records.
Type of Record: CNAME
Name/Host Name: selector2._domainkey
Data/Value: selector2-your-domain-name-com._domainkey.your-domain-name.onmicrosoft.com
TTL: 1 hour
Once added, go back to the Office.com admin portal.
https://security.microsoft.com/dkimv2
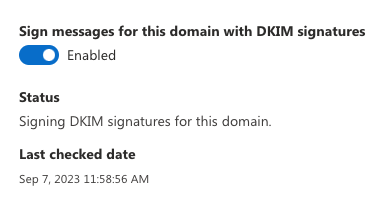
You will now see an option to Sign messages for this domain with DKIM signatures.
Please note it may take an hour or more for the DNS records to be update. You may not be able to enable this feature until the DNS records have been populated. It could take 12 to 24 hours for the changes to take effect.
For those using Google Workspace please visit the following URL.
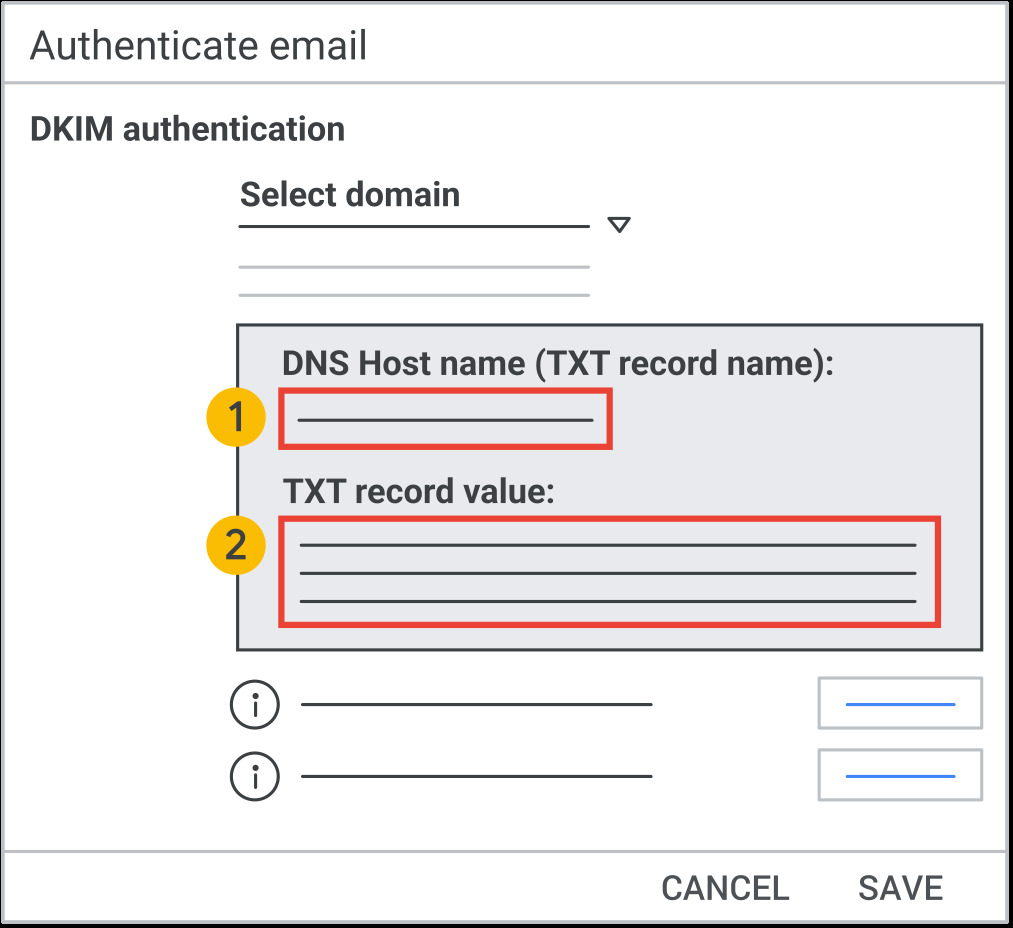
In the Admin console, go to Menu > Apps > Google Workspace > Gmail.
Click Authenticate email.
In the Selected domain menu, select the domain where you want to set up DKIM.
Click the Generate New Record button.
In the Generate new record box, select your DKIM key settings.
Once generated, go back to your domain register and select the option to add a new TXT record.
Here’s an example.
Type of Record: TXT
Name: google_domainkey.your-domain-name.com
Data: v=DKIM1; k=rsa; p=MIIBIjARBgkqhkiG9w0BAQEFAAOCAQ8AMIIBCgKCAQEA3k/6Qwx0e7woVVSIEFASt6niZtXd2R74MfOLOJ/WRm/mYAvyv7RBt3nG1eIw4CNqsNIctysuAEwvgkBXsTTaSqgZQcamrBWEvP6xTcIpOkgTXjGy7d1+znmqdnTyO/dWXFvIRcgcTO/St5RVhqJCsV1tiYzHGC3qwLcu53CrzljPEa9tCdG0Ut8rpY3WDdAEODVYhWpQbNCBL1GUIXd/icfQI+gp2QUhxf6xOne46f01Z0rD8Q6wM6TCC1D2DvUrzULUK4xjoE/T/rj7Oz0JEP9cuqNx8T/Y5KyVbsRRPe4B1tD4o50Td4sZoKQEJ3bBWgVldOGk+Tlv8QwrllHAmQIDAQAB
TTL: 1 hour
Finally, go back to the Google Admin Console.
In the Admin console, go to Menu > Apps > Google Workspace > Gmail.
Click Authenticate email.
In the Selected domain menu, select the domain where you want to turn on DKIM.
Click the Start authentication button.
DKIM stands for DomainKeys Identified Mail. It uses a digital signature to verify that a message was sent and authorized by the owner of a domain.
DMARC Records
Adding a DMARC Record is probably the easiest and last step. The process to setup a DMARC record is the same for Google Workspace, Microsoft Office 365 and self-hosted email servers.
Start by logging into your domain register and select the option to add a new DNS TXT record.
Type of Record: TXT
Name: _dmarc
Data: v=DMARC1; p=none; rua=mailto:email@your-domain-name.com
TTL: 1 hour
Simply put, a DMARC record is a TXT record that tells receiving mail servers what to do with messages that don’t align with SPF and DKIM.
DMARC stands for Domain-based Message Authentication, Reporting, and Conformance.
Concussion
Once all new settings have been enabled, wait about 2 to 12 hours for any real results to appear.
Some email servers seem to take hours before they check for updated DNS records. If you keep getting bounce back messages after 24 hours from one single client. Ask them to let their IT Department know that you’re domain has been blacklisted. It may take their IT admin unblock your domain or at least look into the situation.

